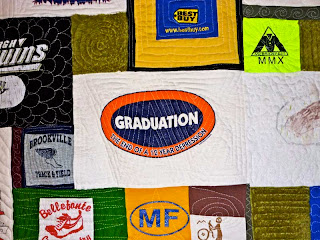
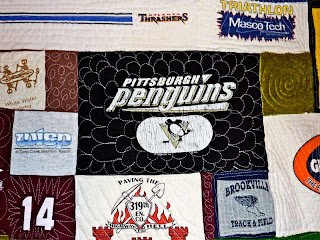
So, let's say someone has asked you to make a t-shirt quilt for you, and you agree. And then they cheerfully add "and I've already cut the t-shirts out for you."
Did you hear that? That was me groaning.
If at all possible, try to get the t-shirts before they've been cut. However, since many people try to make their quilt on their own before seeking out an "expert", you will often have to fix badly pre-cut t-shirts.
Remember before when I said I like to hold on to that extra t-shirt material (from the backs and sides, etc)? Here is where that will come in handy.
Here is an example of a shirt that was cut out with a pair of scissors (not a a rotary cutter). This person* probably just grabbed any old pair of scissors out of a random junk drawer (I'm cringing!) and started randomly cutting around the designs they wanted to keep. (*This person is a friend of mine, and I had permission to make fun of her cutting mistakes. :)
Actually, this one was one of the better-bad-cuts of this bunch. The weird sideways and circle cuts have been the hardest to straighten out!
Overall, these cuts are generally not straight and will be very ragged. Often they have cut extremely close to the design, meaning in "fixing it" some of the design will even get cut off. :( But the good news is...no matter how bad the cuts are, you can fix them!
First, lay the t-shirt out and determine if you can just cut them down to a good square size. More often than not, you will not be able to, because people tend to cut within an inch or so of the design, but it's worth a check, because sometimes you get lucky.
First, I cut the crooked ragged edges off to make 4 straight and clean sides.
The block is an odd rectangle now, so to make it square, I will add strips of that extra t-shirt fabric. Since the quilt it is going in has a lot of white, black, and brown t-shirts, I decide to use orange strips for a pop of color. Plus, they match the letters on the shirt.
So I cut some strips.
After sewing the strips on, I cut down any extra seam, to make it less bulky.
Then I sewed on strips to the top of the block.
Then trim it down to one neat square size.
Here are some other examples of blocks I've fixed from this batch. As you can see, you can either use matching/coordinating fabric (like I did with the blue block), contrasting fabric (like the red and white block that I added green strips to), or even multiple colors (like I added the yellow strips, then smaller black frame to the blue Best Buy block). Also, you don't have to add strips all the way around. For instance, the green and white block I just added material on top and bottom.
Adding strips help add extra color. Plus, they make these smaller designs (remember they were already cut before I got them) bigger, which will help if you are trying to stretch fewer t-shirts into a bigger size quilt.
These blocks were the worst! They were so crooked and cut so close to the designs. Notice on the one block I could not cut it straight
and save the design, so I went ahead and sewed the strip on crooked and then cut it straight. I could tell this shirt had been well worn (read: loved!), so I really wanted to preserve as much of the designs as possible, even if it meant some crooked fabric.
Next step:
Ironing & laying out blocks


