Tuesday, January 31, 2012

Bunting

I have a confession:  I don't get bunting.  (aka banners or penants)

Imagine my Jerry Seinfeld impression: "What is the deal with bunting?"

Bunting, bunting, bunting.  It's EVERYWHERE!  It has invaded Pinterest.  There is bunting spackled all over my favorite crafting blogs.

Especially burlap bunting.  God, people LOVE their burlap bunting.

www.oopseydaisyblog.com
Sometimes literally.

But I just don't get them.

I mean, sure.... they are cute, or pretty, whatever.  But they just hang there.  And they are almost always temporary decoration.

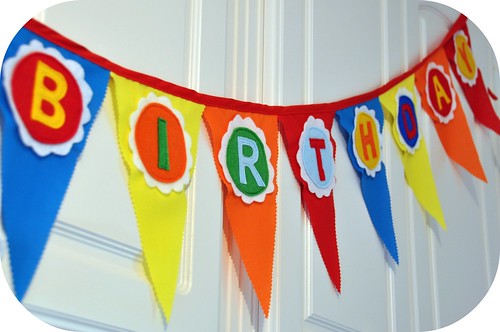
People make birthday bunting.
rosinahuber.blogspot.com
Christmas bunting.
chalk-jenny.blogspot.com/
Halloween bunting.
blog.craftzine.com
Thanksgiving bunting.
blogs.babble.com/
Easter bunting.
favecrafts.com
New baby bunting.
www.thesweetestoccasion.com
Just-for-the-helluv-it bunting.
lavieinspirations.com
If there is a life event, like say today being a Tuesday, bunting enthusiasts can find a reason to whip up a strip of bunting.  (Although, I did search "bowel movement bunting" on google images and came up with bupkis.  So, apparently there are some limits.  That haven't been reached, yet.)

And just where do they put all of this freaking bunting?  You can't convince me everyone in the world but me has a mantle to hang them on!
www.oopseydaisyblog.com

And then what do they do with it after.  You know, after the holiday is over...  I KNOW they don't keep the bunting to reuse it next year.  Because next year they are going to make NEW BUNTING.

In my mind these people have a room in their house just for displaying their old bunting.


Don't get me wrong, I don't hate bunting.  All of these pics I linked to are pics of awesomely done bunting.  But it's like this: I like to quilt, but my house only needs so many quilts.  So instead of making a new quilt after new quilt just because it's pretty and I like to do it, I don't.  And I just work on other, different, projects until the need to make a quilt (birthday, new baby, etc) arrises again.

I guess the difference is that bunting is small, so stores easier (but like I mentioned above, I highly doubt these bunting addicts are rehanging year after year), and also it is very decorational, but still....I can just not wrap my mind around the craft world's new obsession with this cute, but seeming useless craft.

Monday, January 30, 2012

Car Organizer: 1st attempt

Pinterest is just an evil place.  It's like a vortex that sucks me in and says: you must make this project NOW!

Saturday night I saw this car organizer tutorial and thought to myself: Self, your van could really use one of these.

So naturally, I spent a few hours on Sunday afternoon whipping two up for the old family truckster.


When I was finished, I proudly held them up to Superman, anxiously awaiting the bravo and accolades I just knew where coming, but instead, I heard him say Why aren't they gray?

See, one of the points of crafting something like this is to make something useful but for little or no money...(this was no money).  So I just used some flannel scraps I had in my craft closet.  I really didn't think of looking for fabric to match the van's interior (that would have cost money and a trip to the fabric store!).  And I certainly didn't think Superman would care.

But now that they are in the vehicle, I do think I will eventually make some gray ones.  Not because they don't match, but because I will change a few things in my design next time.  Namely:

  1. Material - The tutorial did suggest medium weight material, like twill.  I used flannel (literally cut up a fitted flannel sheet).  It is thicker than say jersey or quilter's cotton, but it is not that firm and looks a little saggy in places.
  2. Pocket size - The top pockets are too deep.  Besides the colored pencils, which are pretty tall, everything sinks to the bottom, and I thus are a little difficult for little hands to reach down into.  So, I'll make the top pocket about 2 inches shorter and raise it about an inch.
  3. Personalization - I am the queen of impatience, so once I decided to make it I just wanted to get it done.  So, I didn't take any time to put little cutesy touches on it.  I'm thinking next time embroidering on some labels, for instance labeling the big pocket "Book", a small pocket crayons, etc. Of course the boys can't read (yet!), but it would a. look cute and b. help Superman know where to put stuff when picking things up off the floor. :)
  4. Color - Okay, I'll admit it would look better gray.  So, I'll keep my eye out at the remnants counter at JoAnn's and Hobby Lobby.

Customized Labels, Part I

So, this project is just in the beginning stages, but I'm too excited about it not to go ahead and share it.

When I've made sewing projects in the past, I've either stuck on those generic Made with love by... labels you can get from Joann's, or worse...put nothing at all.

So, now that I have the BroFo and am busting out beautiful project after beautiful project, not to mention have my own Etsy store, I decided it was time to invest in some personalized labels.

I've seen a few different options for label making, some include ribbons, some include embroidery, some include iron transfers, but my favorite is this one where the woman makes her own labels by first ordering customized fabric, and then making snazzy little labels out of it.

So inspiration struck, and I opened up Photoshop and got to work!   Then I went onto the Spoonflower website and ordered a yard of custom made material with my design on it.  Woo-hoo!

It should be here in about a week.  Then, I'll post an update.  Meanwhile, here is a little sneak peak:


Isn't it just crazy cute?

Easy peasy DIY cake stands

So, I have been really digging all of the thrift store crafty cake stands popping up all over pinterest.  In fact, I started a new board just for the cake stands I see and like.

What I like about this craft is that it is a. super fast, b. super cheap, and c. super practical.

So, I am on the Parent Advisory Board of Thing 1 and Thing 2's preschool.  As the crafty mom on the board, I usually come up with the ideas for the gifts and tokens of appreciation for the teachers.  And since Valentine's Day is coming up, I decided it was the perfect time to try out making one of these uber cute stands.

I visited the local goodwill and found 2 matching plates and one slightly smaller coordinating plate (@ 1.99 each).  Then I found a little blue ceramic candle stick holder (.99) and a slightly taller crystal candle stick holder (.99).  I was disappointed at the overall lack of candle stick holders.  In my mind, the thrift store would have dozens and dozens of discarded candle stick holders to choose from, but in reality, I chose these two because they were two of only four that I could find.  My other choices were a short fat brass one and a square wooden one.

Anyway, I brought them home and scrubbed them all really well.  Then let them dry.  Then, I got out my trusty gorilla glue (most tutorials I've read recommended using gorilla glue because it is strong and waterproof, so you can wash the stands) and glued the small candle stick to the bottom of one of the matching plates and then crystal candle stick to the top of the other.  Then I taped them down with painters' tape and placed my college Shakespeare anthology on top of one and my collection of Jane Austin book on top of the other.  After about 2 hours, I untaped the crystal candle stick and then glued it to the bottom of the slightly smaller coordinating plate, to achieve a double tiered cake stand.

On Valentine's Day, we are going to load these plates up with chocolates, cookies, cupcakes, and other treats and put them in the staff room at the school.

And the best part: after Valentine's Day, the school can reuse these stands in class.  For instance, Thing 1 and Thing 2's class has a tea party every Monday morning.  How cute would these look on their table filled with tea pots and tea cups?!


UPDATE: Here is a pic of the cake stands in action!

Saturday, January 28, 2012

Up-cycled Tshirts

Did I already write about my new sewing machine on here?  I don't think so...

Santa (aka my mom and dad) was incredibly generous this year and gifted me a Brother Se-400 Embroidery and Sewing machine.  I died and went to heaven!  I'd been using a very old basic, basic Kenmore that a friend bought for $20 off ebay and ended up just giving to me because she never actually used it.  It did the basic stitches, but definitely nothing fancy.

My Bro-Fo (we're so tight, it has a nickname)...it embroiders (no more hand embroidering for me!), it has all kinds of cool attachments, it does free arm quilting (something I really needed), and, my personal favorite: it threads it's own needle!  For serious y'all!  I'm dangerously close to 33, and my non-20 something eyes have definitely been squinting more and more when trying to jab the limp thread into that little hole.

Oh, and did I mention that I'd probably used it 20 times before I even used the presser foot?  That's because it has an automatic feed (in three different speeds!).

Well, enough about my Bro-Fo, because Brother isn't paying me to tell you how much I love it.  (Uh-mm Brother...hint hint)

What I'm here to tell you about is that thanks to my new free arm quilting abilities, I've finally been able to complete a t-shirt quilt project I started almost 2 years ago!!

That's right ladies and gentleman, in July 2010, my sister handed me a bag full of motocross t-shirts that she and her family had been collecting over the years, and she asked me to turn them into a quilt.  "No rush" she said.  Uh, good thing.  Because while I'd made quilts before, I'd never made a big one (only baby/crib sized quilts) and had only used standard quilting fabric, not the stretchy jersey material t-shirts are made from.  I started doing research on t-shirt quilts and soon realized that trying to use a walking foot and feed feet with jersey would be disastrous!

During my research I saw lots and lots of examples of t-shirt quilts, but my favorite was a method used by a woman named Andrea Funk because instead of the quilts being blocks of t-shirts, it was more like a puzzle of random shapes and sizes.  They just looked, well cool.  In fact, that is the name of her business Too Cool T-Shirt Quilts International LLC.  For real.

I hopped on Amazon.com and found a copy of her book How to Make a Too Cool T-Shirt Quilt and I was in business.  When it came in the mail, I read it front to back.  Then I cut out all of my sister's t-shirts according to her instructions.  But then I froze with fear over attempting jersey on my Kenmore, so the cut up t-shirts sat and sat and sat until this Christmas when Santa brought me by Bro-Fo.

Now, just a few weeks later, I'm so excited to send my sister her finished t-shirt quilt!!  I think Andrea would be proud.


In fact, it came together so well, that I immediately pulled out my own secret stash of t-shirts I've been saving.  Some of these were cut pre-How to Make a Too Cool T-shirt Quilt, but I was able to make them work (as Tim Gunn would say) by adding strips of extra material here and there.  So far, I've just pieced together the top, I still have to baste it, quilt it, and bind it.  But, I think you can get an idea of how cool this one will turn out too.

My super cute helper, Thing 2.
P.S. Sometimes I forget just how far removed from college I am.  Then I see a t-shirt from Freshman year dated 1997 and I think my god, that t-shirt is 15 years old!!  Yikes!