Saturday, March 31, 2012

Chi Omega Quilt

About a month ago, one of my Chi Omega sisters saw my college quilt on Facebook and said: "Ew, would you make one for me?!"

Then a few weeks later, I received two boxes of tshirts in the mail.

It was really fun working with Katie's shirts because there were so many that I remembered!  Some were shirts I had myself and had put into my own quilt (like the bid day shirt from the rush where Katie officially became a New Member (aka Pledge)) and some were just shirts I can vividly remember her wearing in college.

But Katie likes to keep me on my toes, so she sent not only her favorite tshirts, but a few sweatshirts, and her White Carnation formal gown!!  It was fun (and a little challenging) to work with the jersey material with the sweatshirt material and satin and lace.

The top is now all sewed together.  The next step is finding the perfect backing material, and then quilting!

Click to enlarge

Sunday, March 25, 2012

Craft Room Upgrade

So, when I originally designed my craft room, this was my inspiration:


Now, since I didn't have a window on the area of the wall where my main shelves would go, I had to improvise and decided to put a dry erase board there, as you can see in my pics from the post about the ribbon organizer project.


The thing is, I NEVER use that whiteboard!  Never.  I think Thing 1 and Thing 2 have drawn on it more than I have.

So, I decided I wanted to replace it with something more functional...a peg board.

I went to Lowe's and was able to find a 2 ft x 4 ft pre-cut peg board (otherwise they came in HUGE sheets!) for $5.  I also picked up a 47 pc assortment of peg hooks for $9.

The pegboard was a brownish color, so when I got home I primed it and painted it white.

Then I hung it (remember you need to leave space behind it for the peg hooks...my assortment kit actually came with rubber spacers, which made it easy).


Then I added my peg hooks.


Then I ended up totally rearranging the peg hooks as I placed the items I wanted to hang. :)

I don't have it fully organized yet, but here it is so far.


(Please ignore the mess on the bottom right.  It's a combination of some stuff that needs to make it onto the board and stuff that needs to find a place to go.)

Tuesday, March 20, 2012

Tooth Fairy Pillows

So, I haven't posted in a while, because I was on vacation!

It was Spring Break time for our local schools, so we decided to load up the family truckster and head to my hometown, Virginia Beach, for a week of friends and family fun.

Before I went though, I had to finish up a few projects.

Firstly, I made some border curtains out of table cloths for a friend's mom's canopy bed.  Pictures coming soon...

Second, I made two tooth fairy pillows for kids of friends.  Aren't they darling?


When I came home, I was greeting by two large boxes of tshirts, sweatshirts, and even a formal gown!  These were sent by an old college friend who is paying me to make a tshirt quilt for her.  I can't wait to see how all of these pieces come together!

Sunday, March 4, 2012

Ribbon Organizer

I'm not a ribbon maniac.  I don't have rows and rows of all of the colors of the rainbow.  But, I do have a small assortment that I store like this:


The problem with this storage method (besides not looking neat and kept) is that I can't easily see the ribbon I have (there are spools under that mess!) and therefore rarely use what I actually have.

One day at Michael's I saw this storage system:

I like how the ribbons are stored at the bottom.  So I decided I could come up with something similar in my craft room.  (But spending a lot less $$ than the $49.99 this storage system costs!)

Here is my existing area:


First, I found a dowel I knew we had in the garage.  (You can find these at the hardware store for like $1.) 

Then I took a thick cloth ribbon I had (in the basket of ribbons)...


folded it in half and measured 3/4 inch...


and sewed a loop.


Then I sewed the top half of the ribbon together also (not pictured).

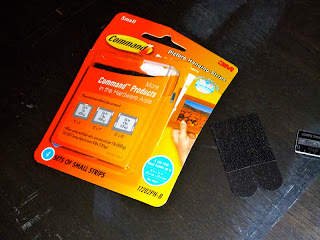
I found some small Command velcro strips in the garage.  (For the record, I wanted to screw them in, but Superman convinced me I should go with these strips.  Only time will tell who was right.)


Stick a strip over where you sewed the strips together...


then trim off the extra. I sewed it on using a basic straight stitch.


 Put the corresponding velcro on, and trim it down also.


Then stick the ribbons up underneath the shelf (obviously measure first).


Then put your spools of ribbon on your dowel, and stick each dowel end into the small loops you sewed.


Total time: 15 minutes
Total cost: $0 (since I used all found materials I already had at home.

Update: I spray painted the dowel black. What do you think?


My next craftroom improvement project will be replacing that dry erase board (I never use) with a pegboard system. Pictures coming soon!

Saturday, March 3, 2012

T-shirt pants

So, you've made a t-shirt quilt, and you have a bunch of left over jersey material.  What do you do with it?  You don't want to just throw it away.  It seems like a waste of perfectly good fabric.

Or maybe you just have an old tshirt you never wear anymore, but can't quite bear to part with yet.

The solution: pajama pants.

Well, maybe not pajama pants for you.  But definitely pajama pants for babies or toddlers.

Estimated time: 20 minutes

Step 1.  Okay, I didn't do a good job taking a picture of step one.  But just imagine if you will.  You can either start with two tshirt backs (the leftover backsides from cutting out the fronts for your quilt) and fold them in half.  Or start with one tshirt and cut it straight across under the armpits (should leave you a square shape of the bottom of the shirt).

I'm using two tshirt backs for this tutorial.

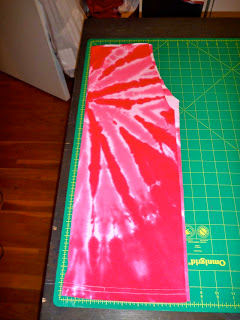
Step 2.  Take a pair of pajama pants and fold them in half, then lay them over your tshirt back (remember it has been folded in half), making sure that the fold is lined up with the outside of the leg (the long straight side).  Then, using a rotary blade, carefully trace around the pants, leaving approximately .25-.5 inch border, if the pants should be the same size.  

My boys are actually close to outgrowing these pajamas (they are definitely high waters), so I left about an inch all the way around, and 3 inches on the bottom.


Step 3: Then flip the cut leg onto the other leg and trim up so that they are the same shape.


Step 4:  Now, unfold the pants and refold them back, but with the right sides (the sides worn on the outside) facing each other.  Pin up the straight line.


Step 5:  Sew up the straight part.  (I use a stitch that is part straight stitch and part zig zag.) 


Step 6:  Repeat for the other leg.

Step 7:  Now, take on of the legs and turn it right side out.  Take the leg that is right side out and slip it into the leg that is still inside out.  You want to line the to legs up so that their seams are straight together.  Then pin the U-shape together (make sure all of the pins are on the same side, whichever side you choose.

This should look like this... Like one big tube lined with another big tube.  Right sides facing each other on the inside.


Step 8:  Slowly sew together the pinned U-shape.  Go especially slow around the seam.


Step 9:  Pull the tucked in leg out.  They should be looking like pants now!  And all of the inside seams should be on the same side and facing out for now.

Step 10:  Measure the recipient's waist.  My boys have 18 inch waists.  So I cut a 19 inch strip of 1 inch elastic.

Step 11:  Fold down the waist of the pants.  I like to measure how much I'm going to fold with the elastic under it, so I know approximately where I'm going to want to sew to leave a big enough tunnel for the elastic.


Step 12:  It's hard to see in the picture, but when I'm pinning, I use two really big pins about 1 inch on either side of one of the seams.  These act as guides to tell me where to start and stop sewing.  You want to leave this opening unsewn, because this is how you are going to get that elastic in there.


Step 13:  Sew the waist you just pinned.

Step 14:  It pin a safety pin (I like to use a really big one) to the end of your elastic, and stick it in the opening you left unsewn on the waist.  Then pull thread it all the way through the tunnel.


Step 14:  When you've reached back to the opening, you should have both ends of the elastic poking out.  First MAKE SURE THE ELASTIC IS NOT TWISTED.  Then, sew the ends together.  Remember, I cut 19 inches for an 18 inch waist, so I want about an inch overlap.


Step 15:  Now sew the opening closed.


Voila!  Super cute, super easy, and completely free pajama pants!

This pretty pink pair goes to a special little lady we are going to visit in Virginia next week.


But don't worry, Thing 1 and Thing 2 got their own pairs too!


And the best part is that this project is so simple, that they HELPED me make the pants.  I'm determined to make sure both of my boys have at least rudimentary sewing skills, as I believe all people should.


So comfy!  Now I just need a super extra giant sized t-shirt to make myself a pair. :)

Thursday, March 1, 2012

Project school quilt

A friend of mine who is a kindergarten teacher at a local private school asked me to make a t-shirt quilt out of t-shirts from her school.

I LOVE how this quilt turned out because the colors are so bright and cheerful.


Don't you just LOVE the tie-dye?  (Wait until you see the toddler pajama pants I made from the leftover material!)